Butterfly Craft Ideas: DIY Handmade Butterflies for Kids
Transform ordinary craft paper into a vibrant delight with a butterfly hand craft project perfect for kids! Not only is it a fun and engaging activity, but it also fosters creativity and motor skills development. Let's delve into this wonderful world of recycled crafting, perfect for promoting eco-friendly learning from an early age.
Butterflies are not just beautiful, they are also fascinating creatures with intricate patterns and vibrant colors. By crafting butterfly art, children can explore these delicate pollinators while creating stunning, personalized decorations for their homes or gifts for loved ones.
Materials Needed
Gather an assortment of recyclable materials like old greeting cards, wrapping paper, colorful magazines, or patterned felt for the wings. You'll also need:

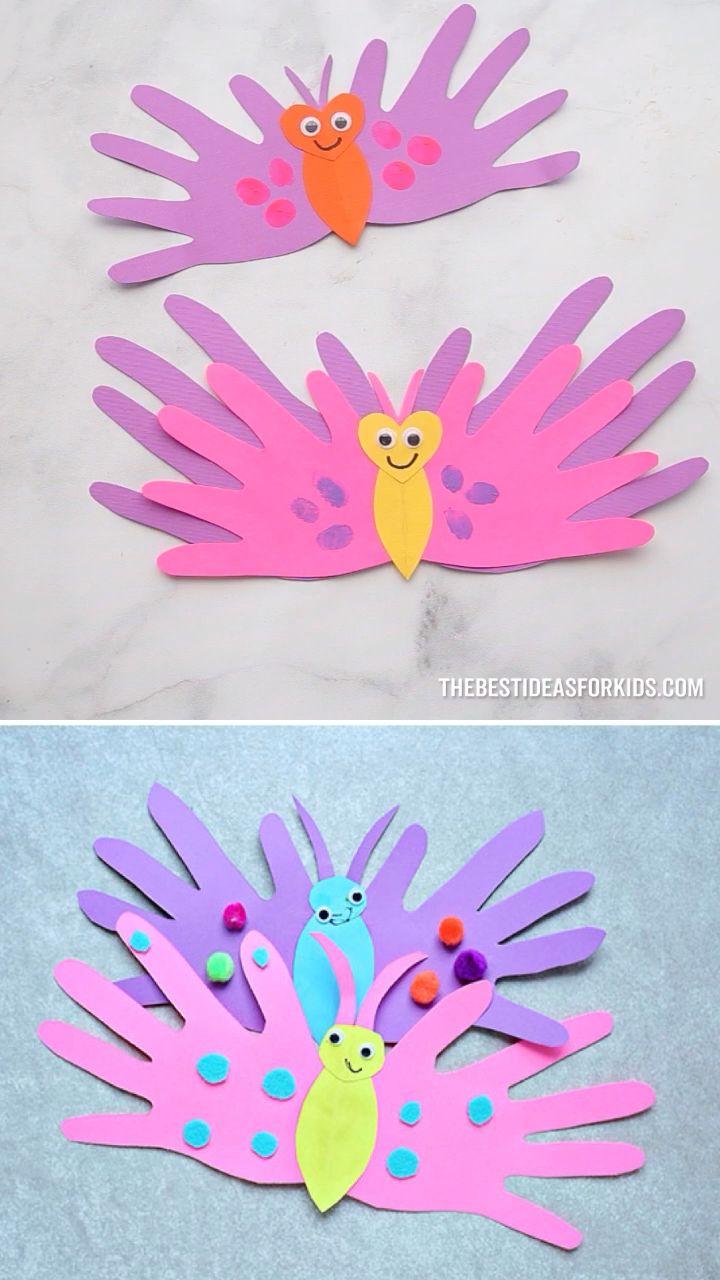

- Craft paper or cardstock (preferably white or lightly colored)
- Scissors
- Glue or double-sided tape
- Butterfly stencils or free-hand drawing skills
- Pipe cleaners or chenille stems (optional, for antennae)
- Markers, crayons, or paint for decorating
Creating the Butterfly Wings
First, choose your wing material. Trace or draw a symmetrical butterfly wing shape onto your selected wing material. Cut out both wings, making sure they're identical. For a 3D effect, create multiple wing layers using different patterns and colors.
Once cut, arrange the wings into an attractive design. Use varying colors and patterns to create depth and dimension. Glue the wings together using a strong adhesive suitable for your chosen materials.


Designing the Butterfly Body
On the craft paper or cardstock, draw and cut out a butterfly body. This should be simple oval or teardrop shape, slightly larger than an adult thumb. Choose a color that complements your wing design.
Position the body behind the wing set and slightly overlap at the top. Glue the body to the wings, ensuring they're secure and well-aligned. Allow the glue to dry completely before moving on.
Decorating and Personalizing
Now comes the fun part - personalizing your butterfly art! Let your child's imagination run wild as they decorate their butterfly. Encourage them to reflect their unique personality in their design.


Adding Antennae
Insert a pipe cleaner or chenille stem through the top of the butterfly's head, creating antennae. Twist them into any shape - straight, spiral, or curled. If you prefer, simply draw antennae using markers or crayons.
For an additional touch, use markers, crayons, or paint to add delicate veins or patterns on the wings. You can also write names, dates, or sentimental messages on the wings or body.
Displaying and Gifting
Once dry, your butterfly is ready to be displayed or gifted! Poke a small hole at the top of the butterfly body to hang it as a Bautyfriend or attach it to a greeting card. Alternatively, glue a magnet to the back to create a fridge magnet.


Your beautifully crafted butterfly is not just an artwork; it's a symbol of transformation, growth, and unique beauty. Encourage your little ones to continue exploring their creativity and making their mark on the world through art and craftwork!
Related Articles

Butterfly Craft Book Ideas for Kids
Immerse yourself in the enchanting world of butterflies with the captivating "Butterfly Craft Book". This remarkable publication is not just a collection of...

DIY Butterfly Crafts: Unique Handmade Ideas for Everyone
Welcome to a world ofgentle, fluttering beauty – the delightful realm of Butterfly Hand Crafts. These whimsical creations are more than just craft projects...

Butterfly Hand Tattoo Template: Free Designs & Ideas
Have you ever contemplated adding a touch of whimsy and beauty to your body art with a butterfly hand tattoo template? Butterfly tattoos have long been a...

Whale Shark Craft Ideas for Kids & Adults
Dive into the creative depths of the ocean with whale shark craft ideas! These gentle giants of the sea, known for their unique spot patterns, inspire unique...

Free Printable Butterflies Coloring Pages for Kids
Immerse yourself in the whimsical world of butterflies with our collection of free coloring butterfly pages. Whether you're an adult seeking to unwind or a...

Craft Unique Coffee Filter Butterflies: Simple DIY Instructions
The aroma of freshly brewed coffee fills the air, signaling the start of a new day. But have you ever wondered how those magical grounds become a delightful...